Ham Sliders on Hawaiian Rolls
These warm, buttery sliders are the kind of comfort food that feels right at home on a busy weeknight or a slow family evening. Soft, slightly sweet rolls wrapped around savory ham and melted cheese come together quickly and bake into something cozy and satisfying. ham sliders on hawaiian rolls are loved because they’re simple, flexible, and feel a little special without any extra effort. I usually pull this together when time is short but everyone wants something warm and filling. They work for casual dinners, small gatherings, or those cold nights when turning on the oven already feels comforting.

Why You Will Love This Recipe
This recipe fits right into real life. The flavors are familiar and comforting, with that balance of sweet rolls and savory filling that makes everyone reach for seconds. It’s easy enough for a tired evening but still feels thoughtful, which makes it perfect for family meals or sharing with friends. You can make a full tray at once, and leftovers reheat well, so nothing feels wasted. It’s also budget-friendly, using simple ingredients you may already have on hand. These sliders are cozy, weeknight-friendly, freezer-friendly, and truly crowd-pleasing, which is why ham sliders on Hawaiian rolls often become a repeat favorite in busy homes.

Ingredients
Tip: Choose soft, fresh Hawaiian rolls so they stay fluffy and don’t dry out while baking.
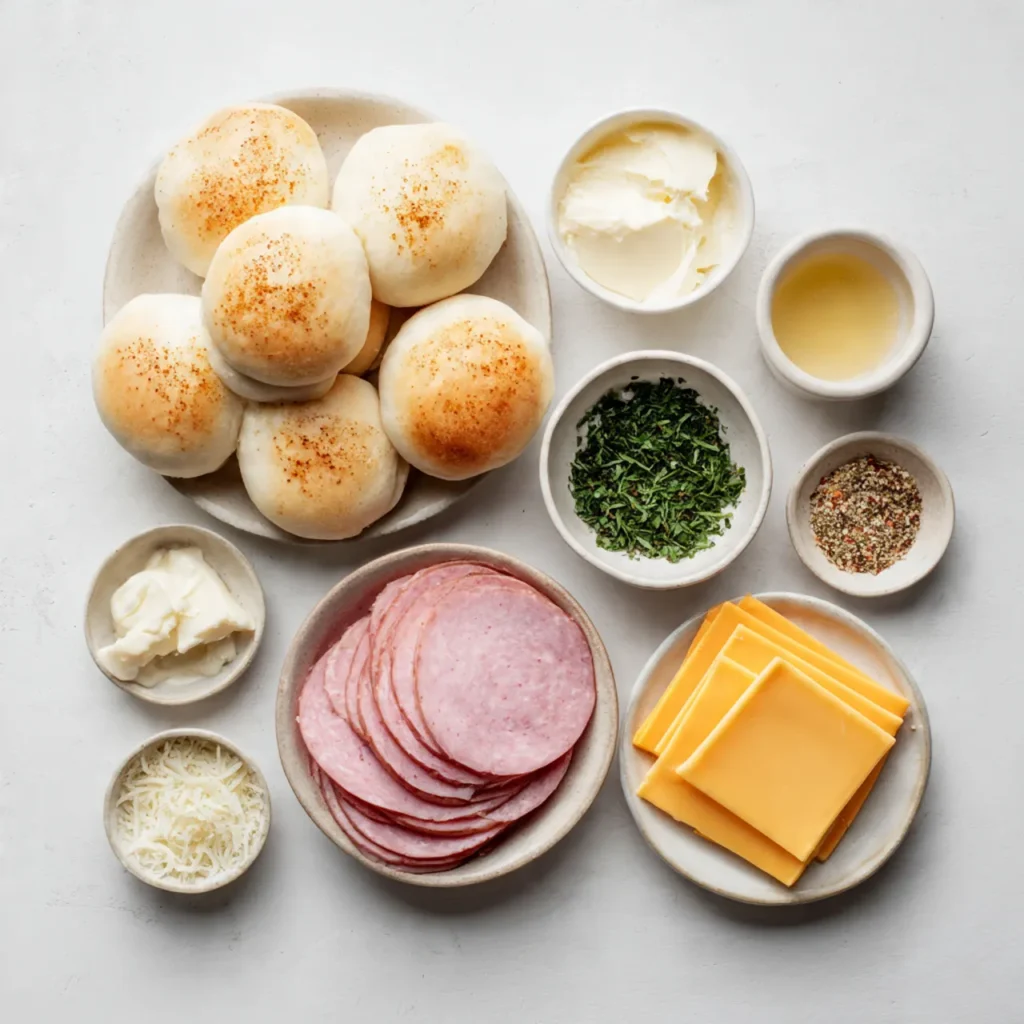
- 12 Hawaiian rolls
- 12 slices deli ham
- 6 slices cheese, halved
- 4 tablespoons butter, melted
- 1 tablespoon Dijon-style mustard
- 1 teaspoon onion powder
- 1 teaspoon poppy seeds
Instructions
Step 1: Preparation –
Preheat the oven and lightly grease a baking dish. Without separating the rolls, slice them in half horizontally. The bottom layer should stay intact. Lay it in the dish and notice how soft and pillowy the rolls feel under your hands.
Step 2: Main Cooking Process –
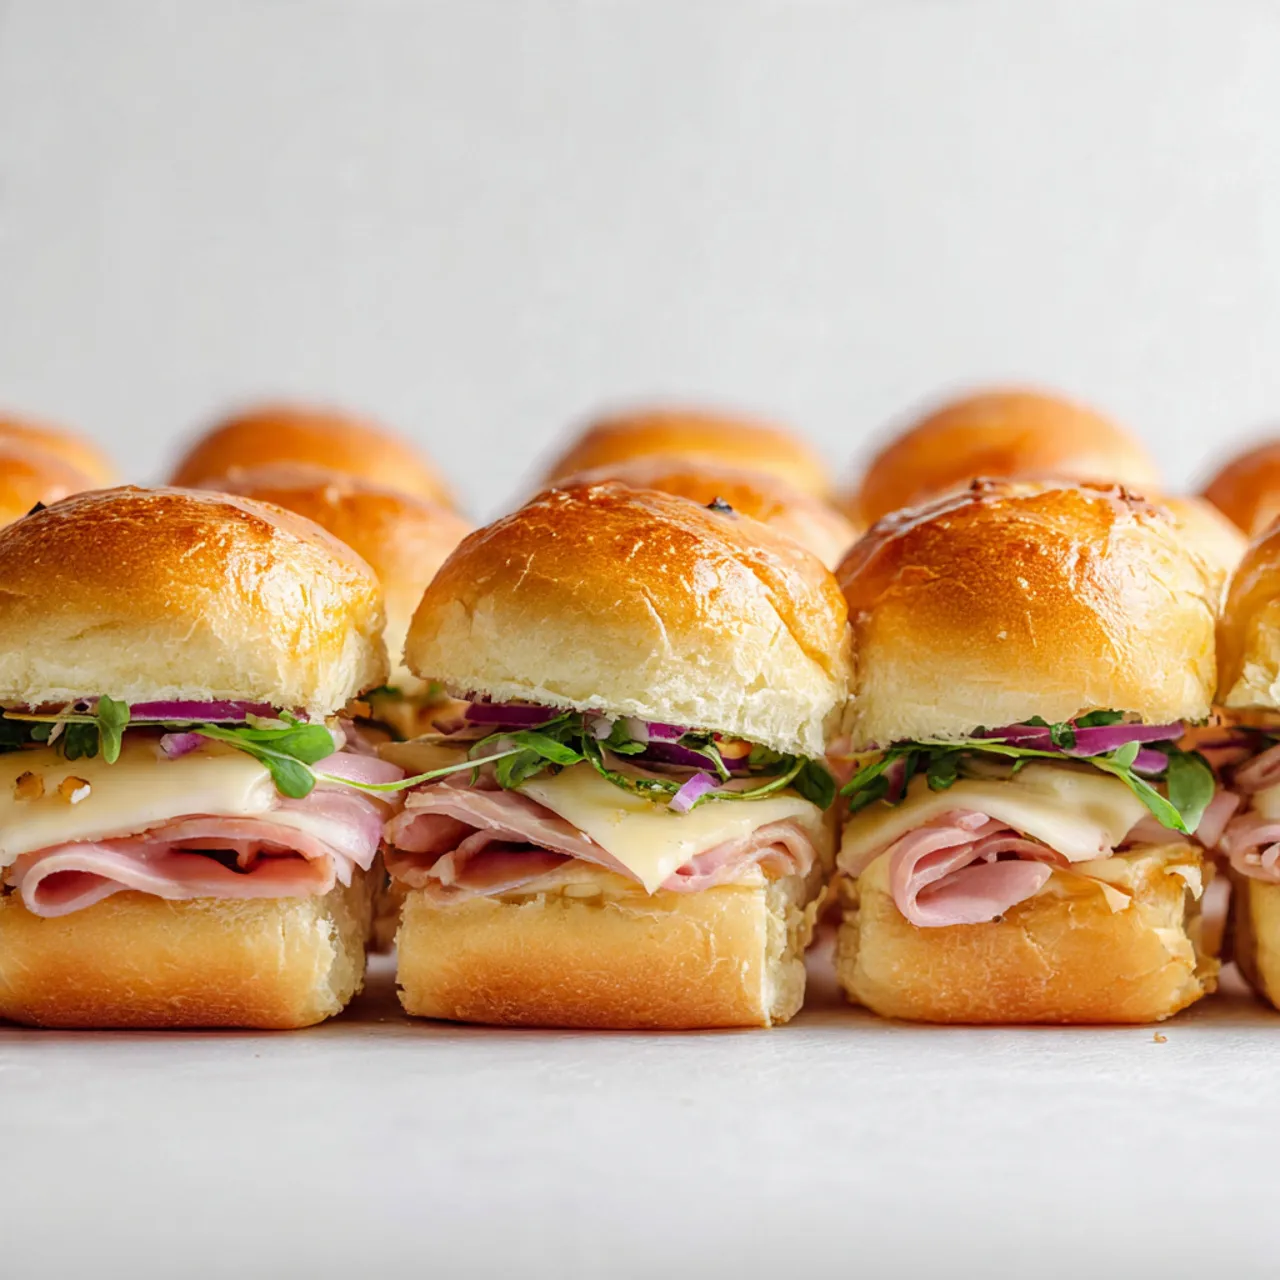
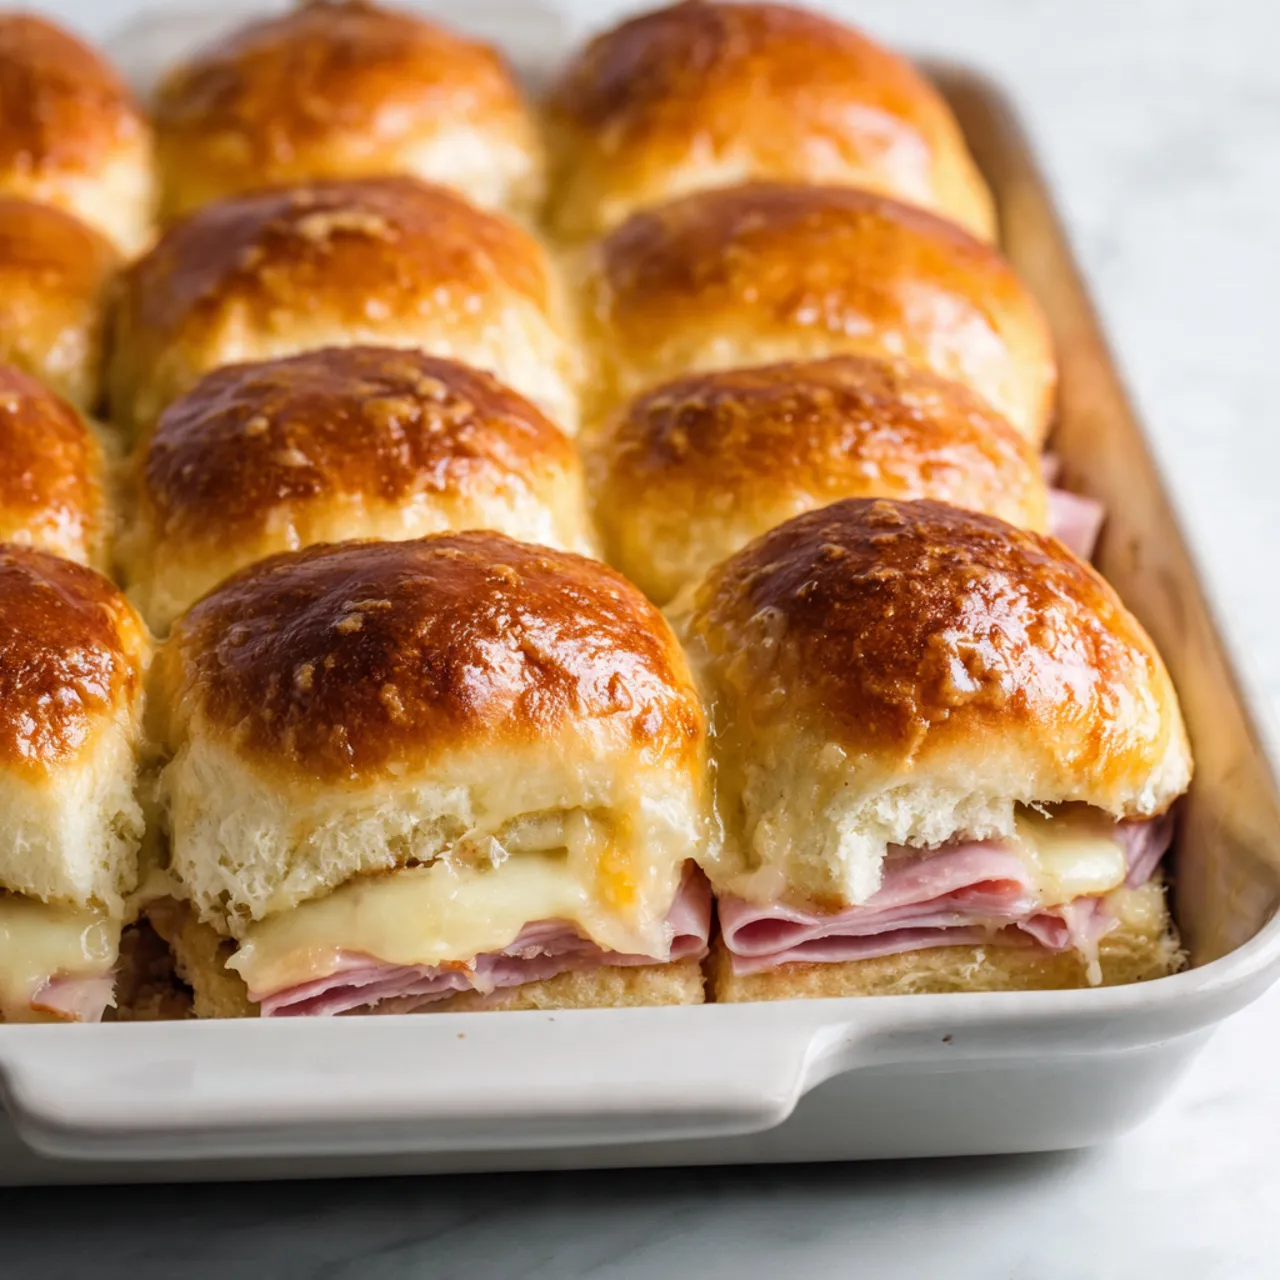
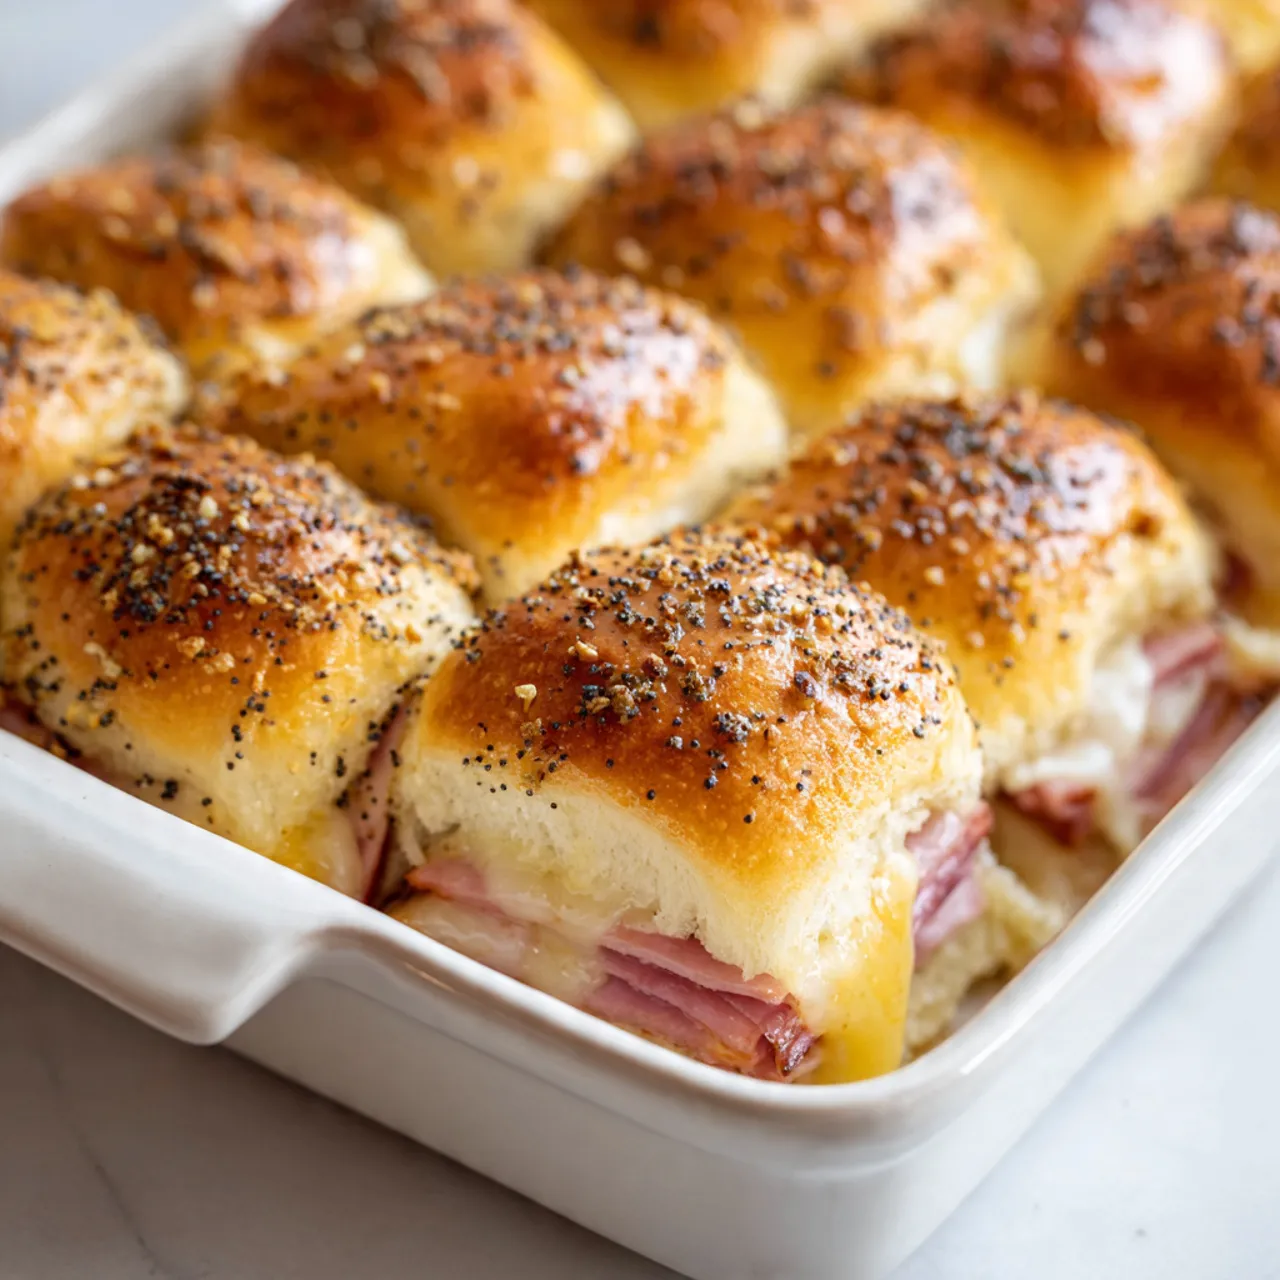
Layer the ham evenly over the bottom rolls, folding slices slightly so every bite has some. Add the cheese on top. The layers should look generous but not overflowing, with edges still neat and easy to cover.
Step 3: Combining Ingredients –
Place the top half of the rolls back on. In a small bowl, stir melted butter with mustard, onion powder, and poppy seeds. Brush this mixture over the tops until they look glossy and smell rich and buttery.
Step 4: Finishing & Final Simmer –
Cover loosely with foil and bake until the cheese melts and the sliders are heated through. Uncover for the last few minutes so the tops turn lightly golden. Let them rest briefly before slicing and serving warm.
Why This Recipe Works for Busy Days
This is the kind of recipe you can assemble ahead and bake when you’re ready. Everything cooks together in one dish, which means less cleanup and less stress. It’s easy to double for leftovers, and reheating is simple. For Pinterest cooks who save recipes for later, this one fits neatly into meal prep plans without feeling overwhelming.
Tips & Tricks
- Keep the rolls together: Cutting the rolls as one slab makes layering faster and cleaner. Separating them too early can lead to uneven filling and messy edges once baked.
- Don’t oversoak the tops: Brush the butter mixture generously but slowly. Pouring it all at once can make the tops soggy instead of lightly crisp and golden.
- Cover before browning: Foil helps the sliders heat through without burning. Skipping this step often leads to dark tops and cold centers.
- Rest before slicing: Letting the sliders sit for a few minutes helps everything settle so the layers stay together when cut.
Variations
Meaty version:
Add a second layer of meat, such as turkey or roast beef, along with the ham. Keep the slices thin so the sliders don’t become too heavy. This works well when you’re feeding bigger appetites or want something extra filling.
Vegetarian option:
Replace the ham with roasted vegetables like mushrooms, bell peppers, or zucchini. Season lightly and cook them first so they don’t release too much moisture during baking.
Ingredient swap:
Use Swiss, provolone, or mozzarella instead of your usual cheese. Each melts differently and changes the overall flavor slightly, giving you a fresh take without learning a new recipe.
Flavor or herb boost:
Mix a pinch of dried herbs or garlic powder into the butter topping. This small addition adds aroma and depth without overpowering the familiar comfort of the sliders.
Serving Suggestions
- Simple family dinner: Serve the sliders with a green salad or steamed vegetables for an easy, balanced meal that still feels cozy and filling.
- Casual gathering tray: Arrange them on a platter lined with parchment and let everyone grab one. They stay warm and inviting, perfect for relaxed get-togethers.
- Comfort night pairing: Add a bowl of soup or baked beans on the side to turn these into a hearty cold-weather dinner.
- Kid-friendly spread: Pair with fruit slices and simple sides so the sliders feel fun and approachable for younger eaters.
Storage Instructions
- Fridge storage: Store leftover sliders in an airtight container in the refrigerator for up to three days. Keep them whole if possible to prevent the rolls from drying out too quickly.
- Reheating: Warm in the oven, loosely covered, until heated through. This keeps the bread soft and the filling melty without turning chewy.
- Freezing: Wrap unbaked assembled sliders tightly and freeze. Thaw in the fridge overnight before baking so they heat evenly.
- Make-ahead tips: Assemble everything up to a day ahead, cover, and refrigerate. Bake just before serving for fresh, warm results.
Recipe Timing
Prep Time: 10 minutes
Cook Time: 20 minutes
Rest Time: 5 minutes
Total Time: 35 minutes
Nutrition Information (Approximate)
Each serving contains roughly 250–320 calories, depending on portion size and ingredients used. Protein ranges from about 12–16 grams per serving, mainly from the ham and cheese. These values are estimates and can vary based on specific products and serving sizes.
FAQs
Can I make these ahead of time?
Yes, assemble and refrigerate, then bake when ready.
What’s a common mistake?
Overbaking, which dries out the rolls.
Can I change the cheese?
Absolutely, any good melting cheese works.
Why do my sliders feel soggy?
Too much butter or uncovered baking too early.
How long do leftovers last?
Up to three days in the fridge.
Can I adjust the flavor?
Add herbs or spices to the butter topping.
Conclusion
These sliders are one of those recipes that quietly earns a permanent spot in your rotation. They’re easy to adjust, forgiving if you’re distracted, and always comforting when they come out of the oven warm and golden. You can tweak the fillings, change the cheese, or make them ahead without stress. ham sliders on hawaiian rolls fit into everyday cooking because they’re simple, cozy, and meant to be shared. Save this one for later, make it your own, and enjoy the kind of meal that feels like home.

Ham Sliders on Hawaiian Rolls
Course: Ham Sliders6
servings10
minutes20
minutes280
kcalSoft, sweet rolls filled with savory ham and melted cheese, brushed with buttery topping and baked until warm and golden. Easy, comforting, and perfect for busy days or family meals.
Ingredients
12 Hawaiian rolls
12 slices ham
6 slices cheese
4 tablespoons butter, melted
1 tablespoon mustard
1 teaspoon onion powder
1 teaspoon poppy seeds
Directions
- Preheat oven to 350°F (175°C). Grease a baking dish.
- Slice rolls in half horizontally and place bottoms in dish.
- Layer ham and cheese evenly on the rolls.
- Add the top halves of the rolls.
- Mix butter, mustard, onion powder, and poppy seeds.
- Brush mixture over the tops.
- Cover with foil and bake 15 minutes.
- Uncover and bake 5 minutes until lightly golden.