Ham and Cheese Sliders
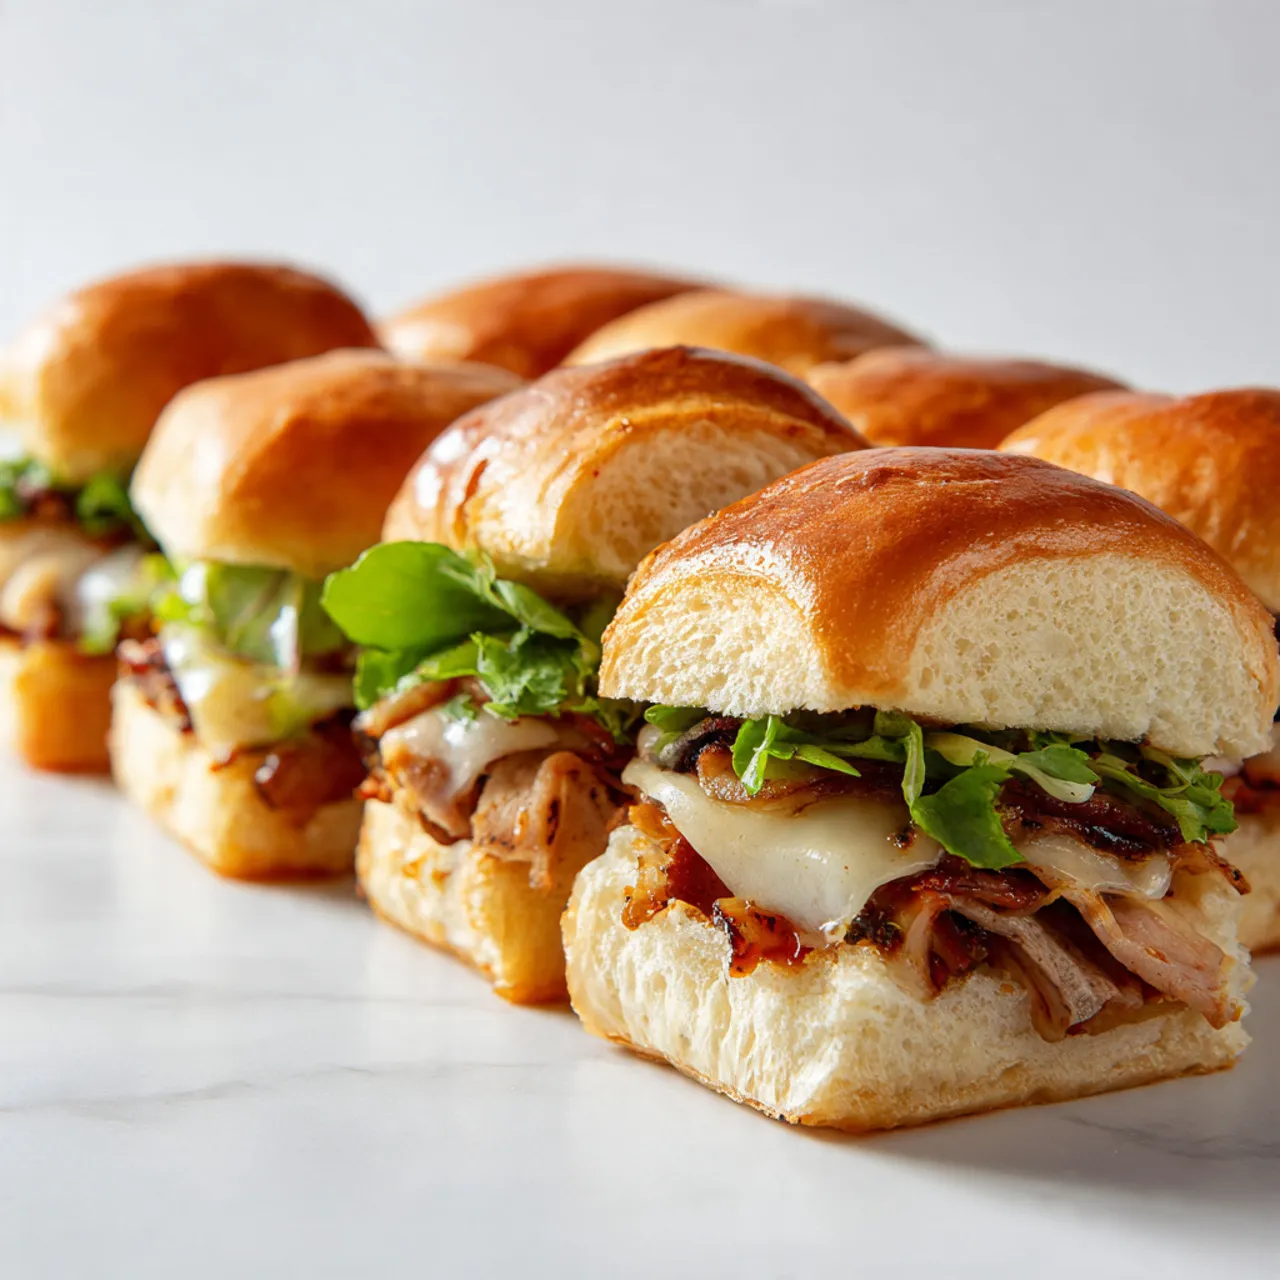
Ham and cheese sliders are one of those cozy, dependable meals that fit right into real life. They’re warm, melty, and comforting, with soft rolls holding everything together in the best way. People love them because they’re easy to make, easy to share, and don’t require much planning. This is the kind of recipe that works for busy evenings, relaxed family dinners, or chilly nights when turning on the oven feels comforting. I usually start assembling them while the oven heats, knowing they’ll bake quickly and come out smelling buttery and inviting. They’re simple, familiar, and always feel like a small win at the end of a long day.
Why You Will Love This Recipe
These sliders check all the boxes for everyday cooking. The flavor is rich and savory, with salty ham, gooey cheese, and soft rolls that soak up just enough buttery topping. This ham and cheese sliders recipe is weeknight-friendly and doesn’t demand much prep, which makes it easy to save and come back to later. It’s also flexible—you can swap ingredients, scale it up for guests, or keep it simple for a quiet dinner. Leftovers reheat well, and the cost stays reasonable since it uses basic ingredients. They’re cozy, crowd-pleasing, and freezer-friendly, making them a reliable option when you want something warm and satisfying without extra effort.
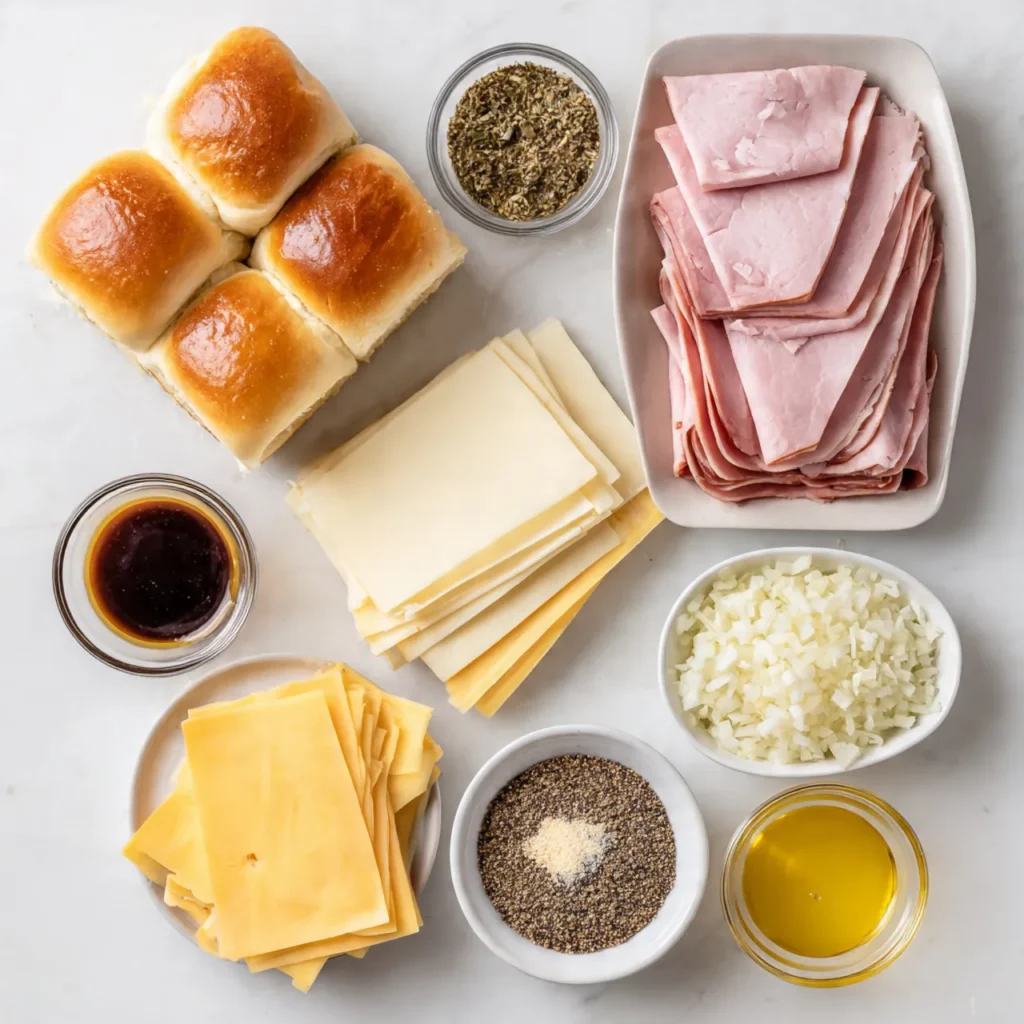
Ingredients
Tip: Choose thinly sliced ham so it warms evenly and stays tender.
- Slider rolls – 12 rolls
- Cooked ham – 12 slices
- Sliced cheese – 6 slices
- Unsalted butter – ¼ cup
- Dijon mustard – 1 tablespoon
- Worcestershire sauce – 1 teaspoon
- Onion powder – ½ teaspoon
- Poppy seeds – 1 teaspoon
Instructions
Step 1: Preparation
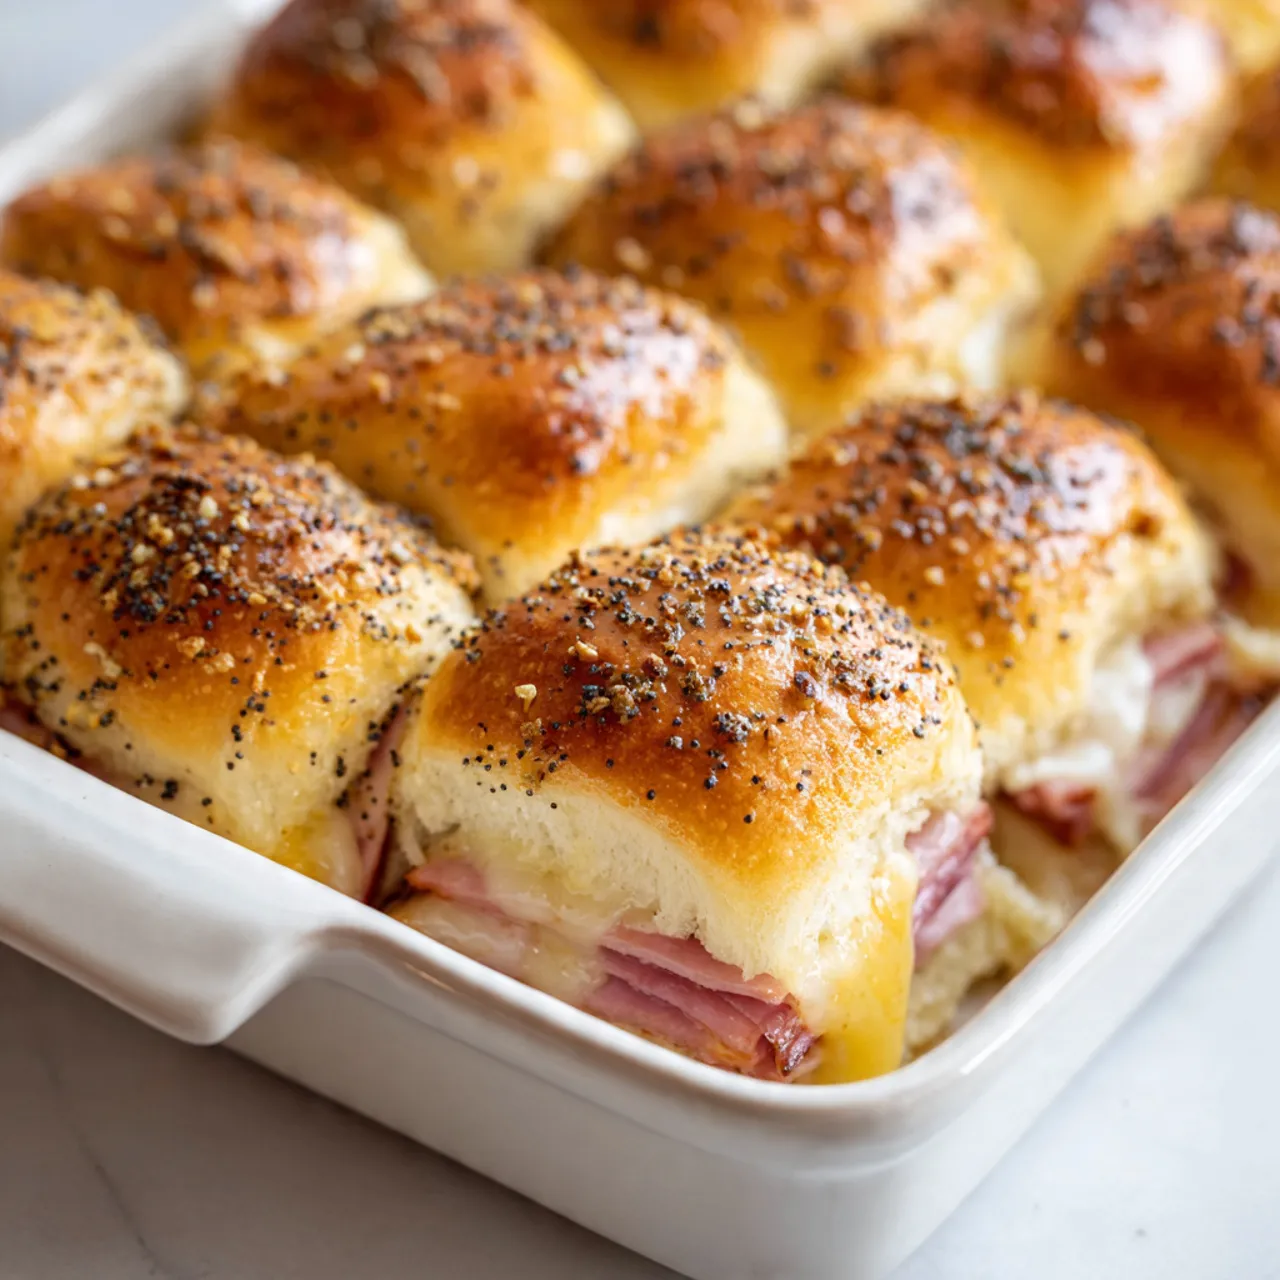
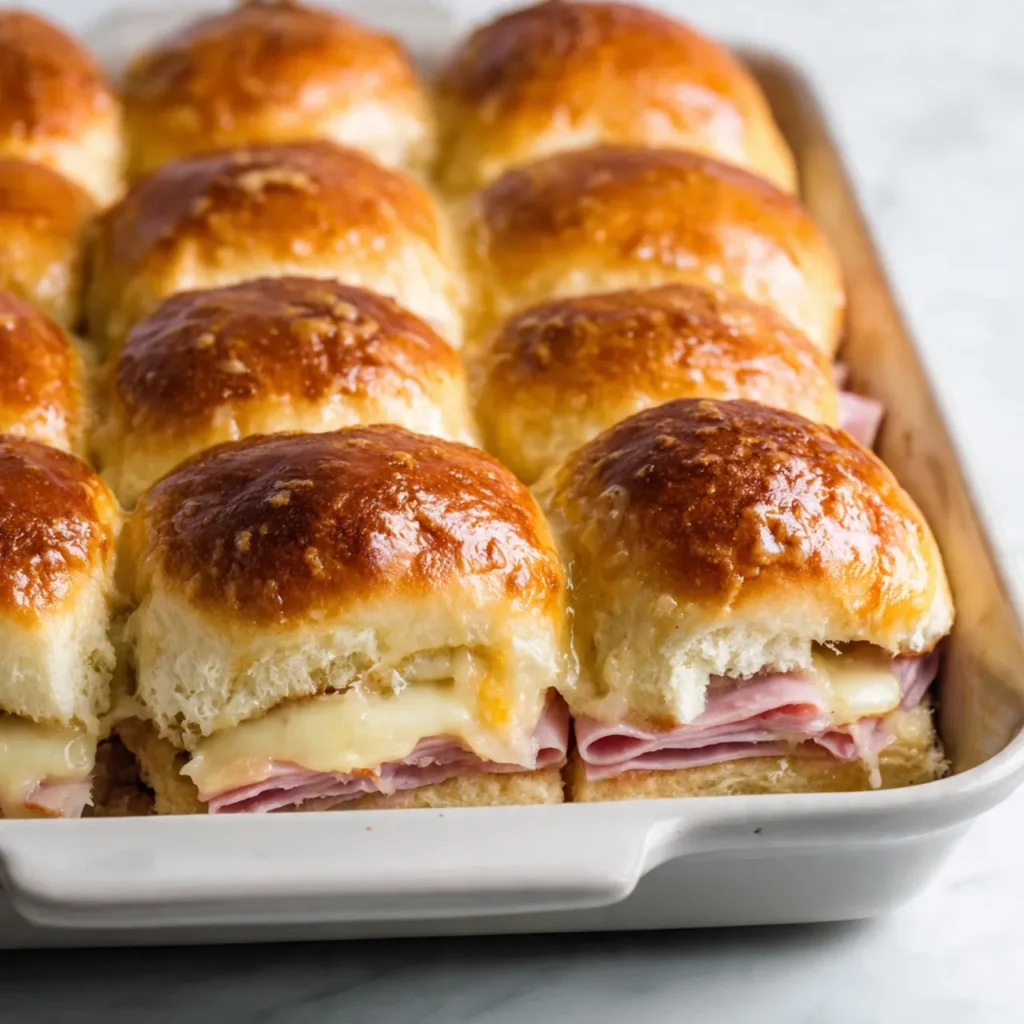
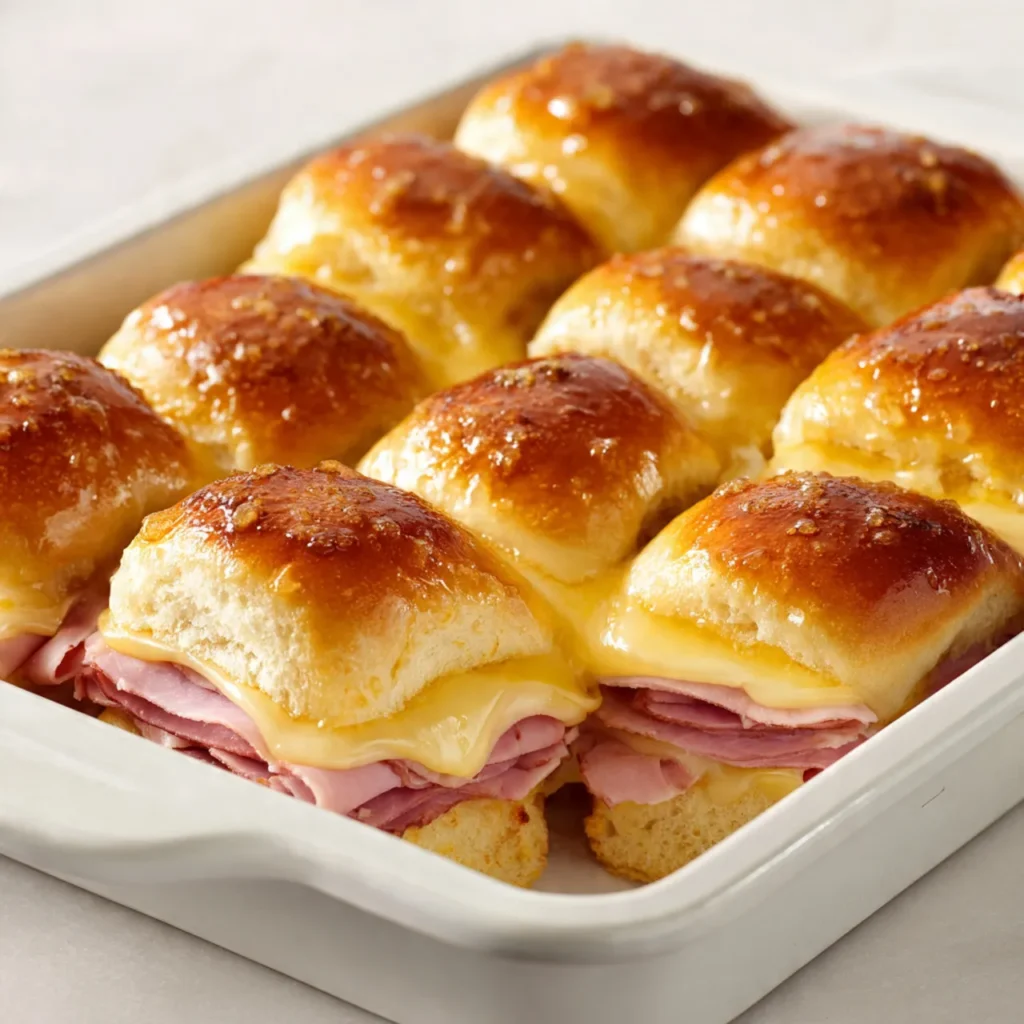
Preheat the oven and lightly grease a baking dish. Slice the slider rolls in half as one piece, keeping tops and bottoms together. Place the bottom half into the dish, ready to be filled.
Step 2: Main Cooking Process
Layer the ham evenly over the rolls, folding slices as needed. Place cheese on top so it covers most of the surface. The layers should look full but not overflowing, with edges still visible.
Step 3: Combining Ingredients
Place the top half of the rolls over the filling. Melt the butter and stir in mustard, Worcestershire sauce, onion powder, and poppy seeds. The mixture should smell savory and look glossy.
Step 4: Finishing & Final Simmer
Pour the butter mixture evenly over the rolls, letting it drip into the sides. Cover loosely with foil and bake until the tops look shiny and the cheese inside is melted. Uncover briefly to lightly brown.
Why This Recipe Works for Busy Days
These sliders save time because everything bakes together in one dish. You can assemble them ahead, refrigerate, and bake later. They reheat well, making leftovers useful for lunch or another quick dinner without starting from scratch.
Tips & Tricks
- Keep the rolls attached while slicing to make assembly faster and neater. Separating them too early is a common mistake and makes layering harder, especially when feeding a group.
- Don’t skip covering the dish at first. Foil helps the cheese melt fully before the tops brown. Baking uncovered the whole time can leave dry rolls and uneven heat.
- Spread the butter mixture slowly and evenly. Pouring it all in one spot can make some rolls soggy while others stay dry.
- Let sliders rest a few minutes after baking. Cutting too soon can cause the filling to slide out, while a short rest helps everything hold together.
Variations
- Meaty version: Add cooked bacon or thin slices of turkey along with the ham. This makes the sliders heartier and works well for bigger appetites without changing the basic method.
- Vegetarian option: Skip the ham and layer sautéed mushrooms or roasted vegetables with cheese. The butter topping still adds plenty of flavor and keeps the sliders satisfying.
- Ingredient swap: Use different cheeses like Swiss, cheddar, or provolone. Each melts a little differently, giving the sliders a new feel without extra work.
- Flavor or herb boost: Stir dried herbs like parsley or thyme into the butter mixture. It adds aroma and depth while keeping the recipe simple and familiar.
Serving Suggestions
- Simple side salad: Pair sliders with a crisp green salad to balance the richness. The fresh crunch keeps the meal light while still feeling complete.
- Soup pairing: Serve with a warm bowl of tomato or vegetable soup for a cozy dinner that feels thoughtful without extra effort.
- Party platter: Arrange sliders on a large tray with pickles or sliced veggies. It’s casual, inviting, and easy for guests to grab.
- Family movie night: Serve with oven fries or chips for a relaxed, comforting meal everyone recognizes and enjoys.
Storage Instructions
- Fridge storage: Store cooled sliders in an airtight container in the refrigerator for up to three days. Keeping them sealed prevents the rolls from drying out.
- Reheating: Warm leftovers in the oven covered with foil to keep them soft. The microwave works for quick reheating, but the oven gives better texture.
- Freezing: Wrap individual sliders tightly and freeze for up to two months. Thaw overnight before reheating for best results.
- Make-ahead tips: Assemble the sliders and refrigerate unbaked for up to 24 hours. Bake when ready for fresh, hot sliders with minimal prep.
Recipe Timing
Prep Time: 10 minutes
Cook Time: 20 minutes
Rest Time: 5 minutes
Total Time: 35 minutes
Nutrition Information (Approximate)
Calories: 220–260 per slider
Protein: 10–14 g
Sliders provide protein from ham and cheese, along with calcium from dairy. Values are estimates and may vary depending on ingredients and portion sizes.
FAQs
Can I make these ahead?
Yes, assemble and refrigerate up to a day before baking.
Why are my sliders soggy?
Too much butter in one spot or uncovered baking.
Can I change the cheese?
Yes, most sliced cheeses work well.
Why didn’t my cheese melt?
The oven wasn’t hot enough or sliders weren’t covered.
How long do leftovers keep?
Up to three days in the fridge.
Can I add more flavor?
Yes, add herbs or a little garlic powder.
Conclusion
Ham and cheese sliders are one of those recipes that quietly earns a place in your regular rotation. They’re easy to adjust, simple to make ahead, and comforting every time they come out of the oven. You can keep them classic or change them slightly depending on what you have on hand. They work just as well for family dinners as they do for sharing with others. Save this one for later, make it your own, and enjoy how naturally it fits into busy days. It’s the kind of meal that feels familiar, warm, and always welcome.

Ham and Cheese Sliders
Course: Ham Sliders12
servings10
minutes20
minutes240
kcalSoft rolls filled with warm ham and melted cheese, baked with a buttery topping. Easy, comforting, and great for busy nights or sharing.
Ingredients
12 slider rolls
12 slices cooked ham
6 slices cheese
¼ cup unsalted butter
1 tablespoon Dijon mustard
1 teaspoon Worcestershire sauce
½ teaspoon onion powder
1 teaspoon poppy seeds
Directions
- Preheat oven and grease a baking dish.
- Slice rolls in half and place bottoms in dish.
- Layer ham and cheese evenly.
- Add roll tops.
- Melt butter and mix with seasonings.
- Pour mixture over rolls.
- Cover and bake until cheese melts.
- Uncover briefly to brown tops.