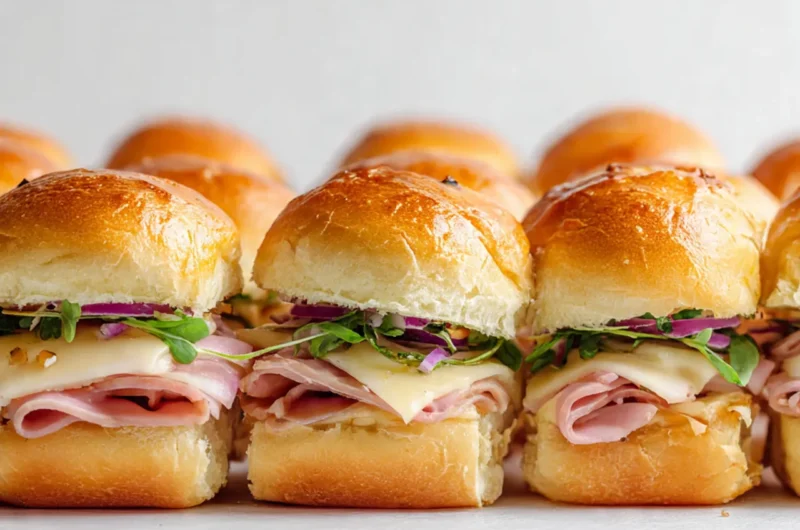
Sliders Recipe
This sliders recipe is all about comfort, ease, and those nights when you want something warm without a lot of effort. Sliders are small, soft sandwiches baked together so they come out melty, cozy, and easy to share. People love them because they feel homemade but don’t require much planning. They work for busy evenings, relaxed family meals, and colder nights when turning on the oven just feels right. I usually reach for this kind of meal when I want something filling that doesn’t take much thought. Everything bakes in one dish, and the result is familiar, comforting, and always welcome at the table.
Why You Will Love This Recipe
This recipe fits real life, not just special occasions. The flavors are simple and comforting, with soft bread, a savory filling, and a buttery finish that feels cozy without being heavy. It’s weeknight-friendly, meaning you can pull it together even when the day feels long. The ingredients are flexible, so you can adjust based on what’s already in your fridge. Leftovers reheat well, making it freezer-friendly and practical for later meals. If you’re feeding a group, this sliders recipe is crowd-pleasing and budget-conscious, which makes it easy to save for future plans. It’s the kind of food that feels reliable and comforting every time.
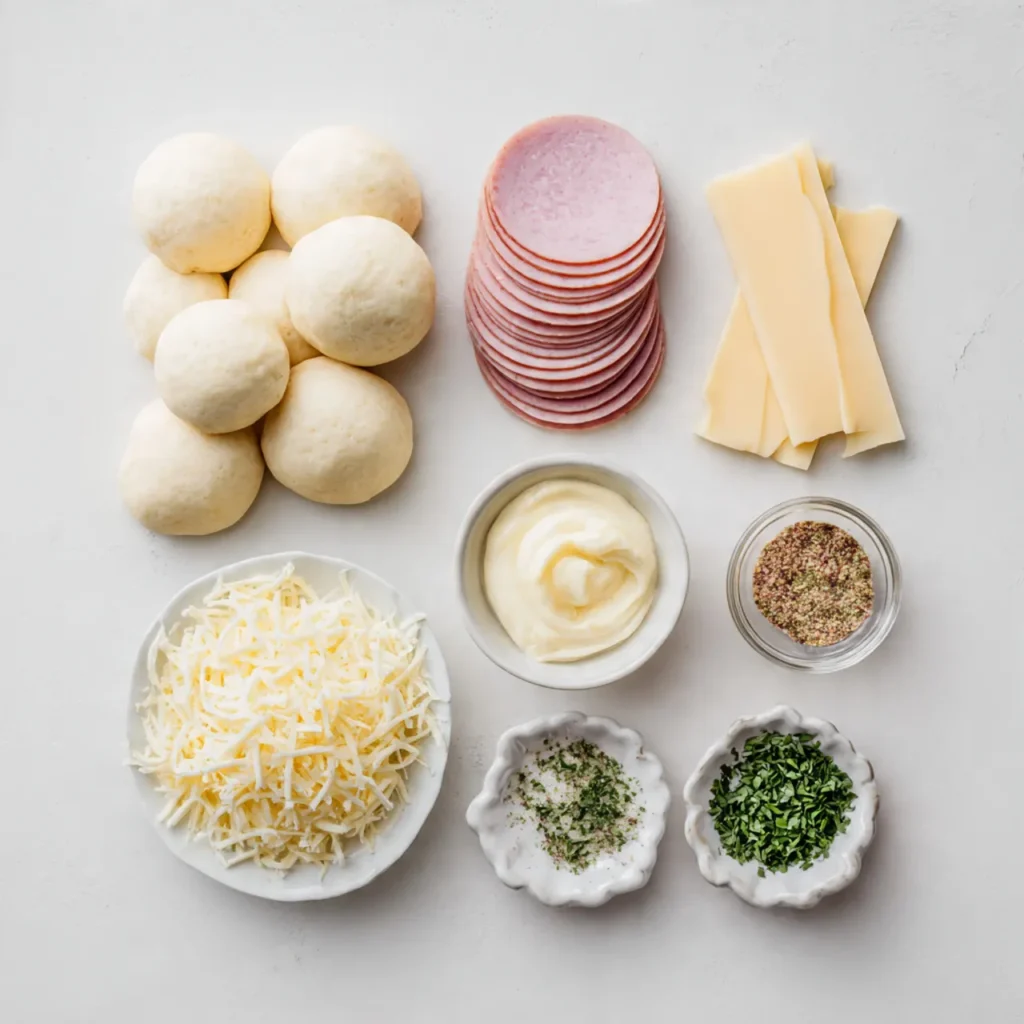
Ingredients
Tip: Choose soft, fresh slider rolls so they stay tender while baking.
- Slider rolls – 12
- Cooked sliced meat (ham or turkey) – 12 slices
- Sliced cheese – 6 slices
- Unsalted butter, melted – 4 tablespoons
- Mustard – 1 tablespoon
- Honey – 1 tablespoon
- Garlic powder – ½ teaspoon
- Onion powder – ½ teaspoon
- Black pepper – ¼ teaspoon
Instructions
Step 1: Preparation
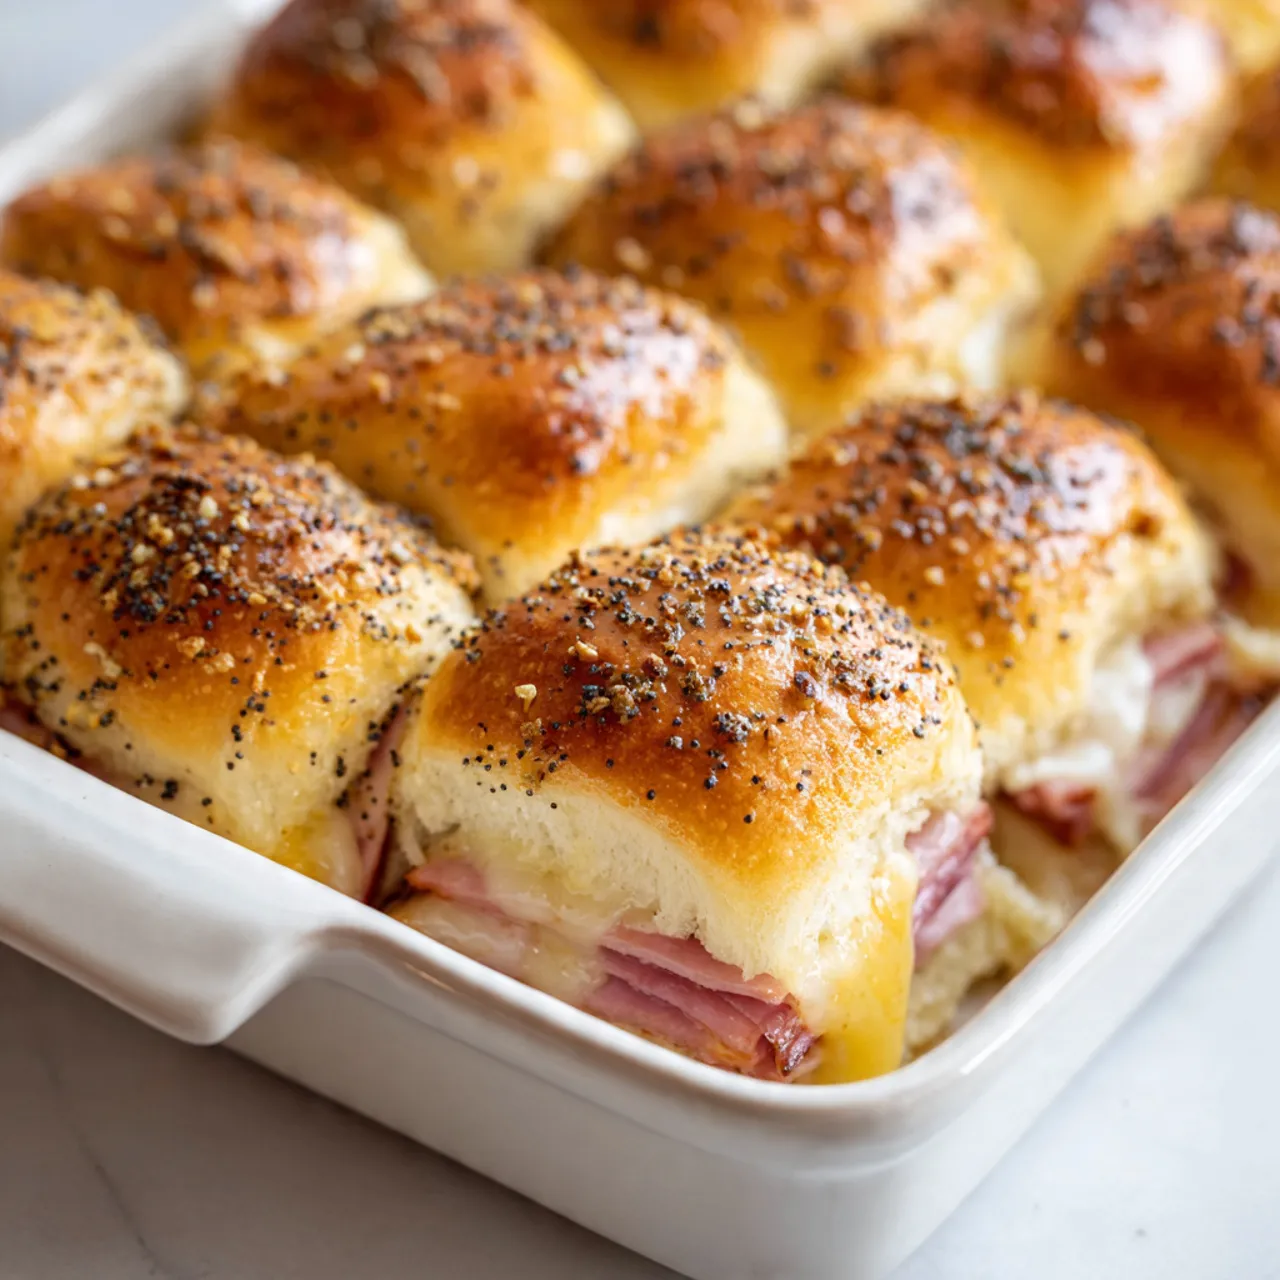
Preheat the oven and lightly grease a baking dish. Slice the rolls in half as one sheet, keeping them together. Place the bottom half into the dish, making sure the rolls fit snugly and sit flat.
Step 2: Main Cooking Process
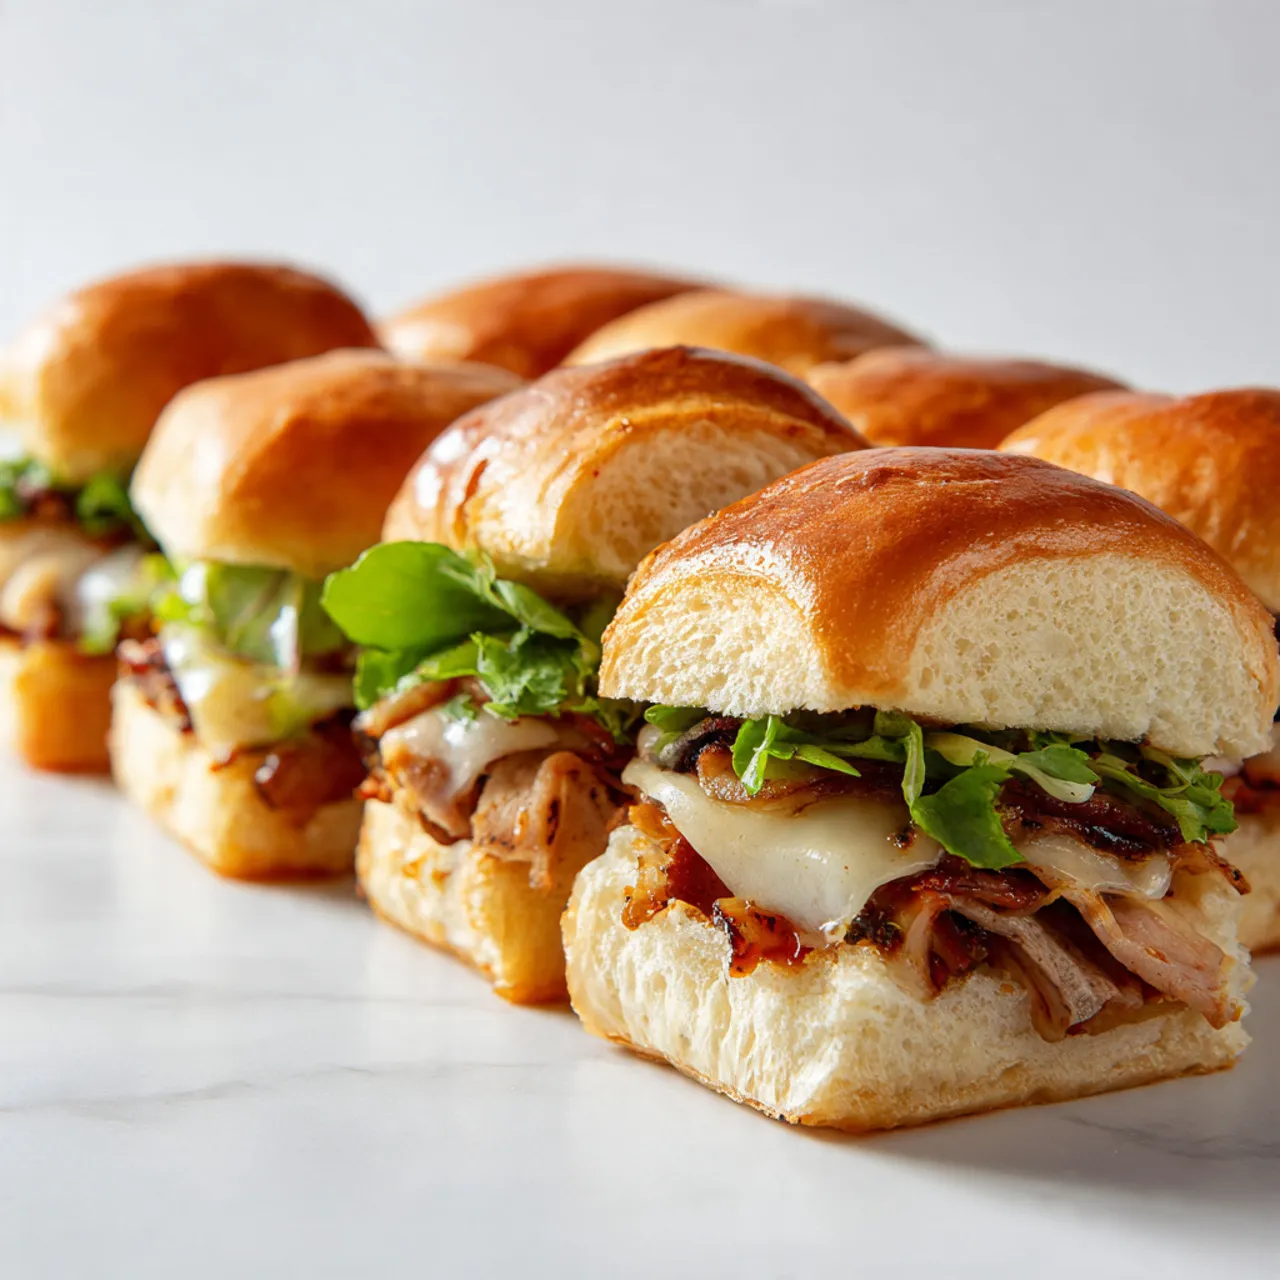
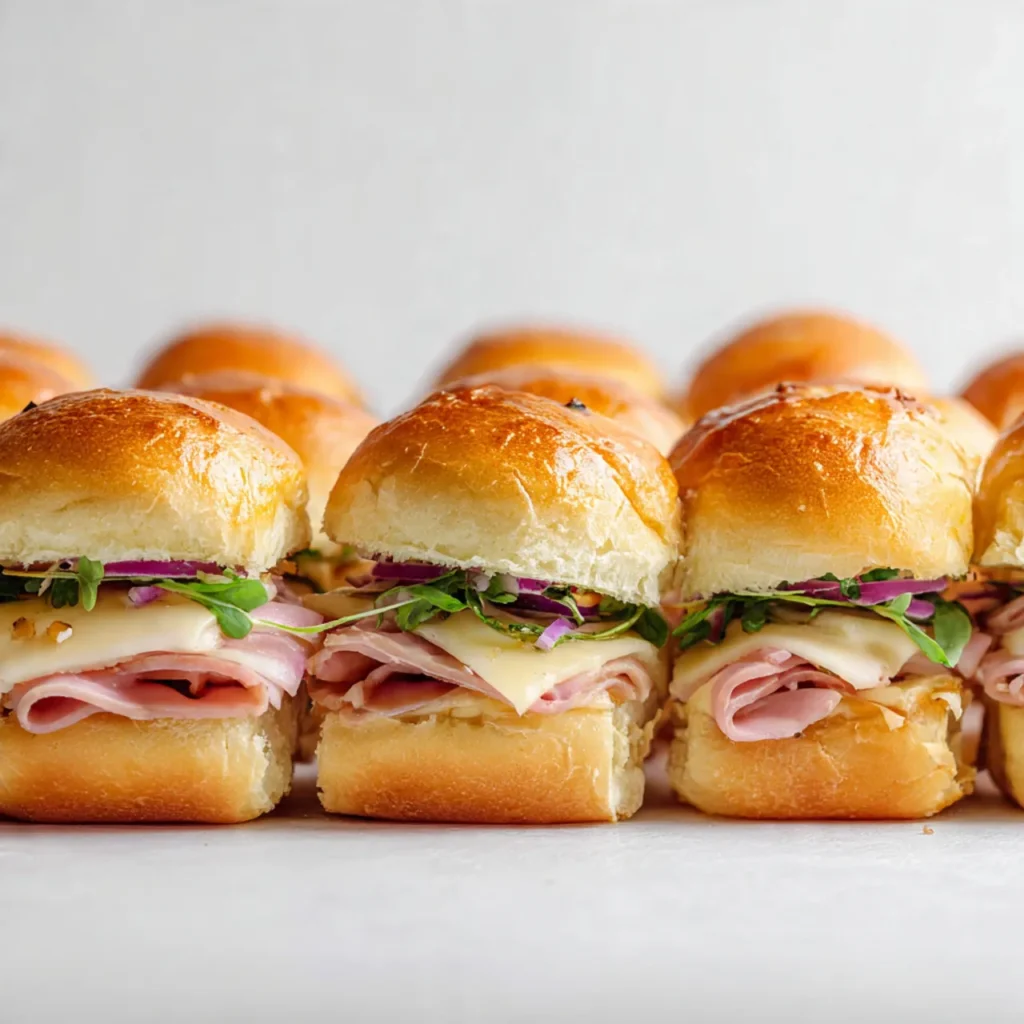
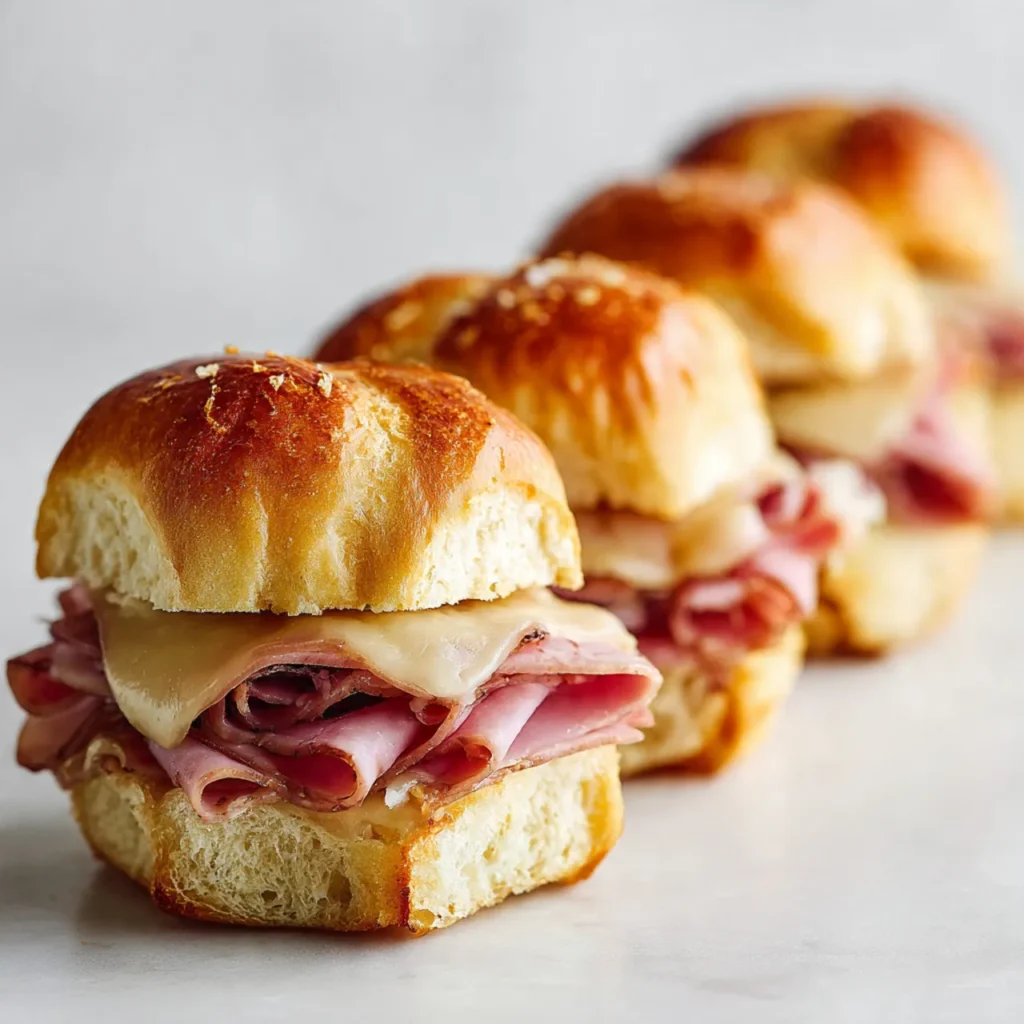
Layer the sliced meat evenly over the rolls, folding gently instead of piling too high. Add the cheese on top so it covers most of the surface. The layers should look balanced and neat.
Step 3: Combining Ingredients
Place the top half of the rolls back on. In a small bowl, stir together melted butter, mustard, honey, garlic powder, onion powder, and pepper. Slowly brush the mixture over the tops.
Step 4: Finishing & Final Simmer
Cover loosely and bake until the rolls feel warm and the cheese looks melted. Uncover for a few minutes so the tops turn lightly golden. Remove from the oven and let them rest before cutting.
Why This Recipe Works for Busy Days
This recipe saves time because everything bakes together in one dish. You can assemble it ahead and cook when needed, which helps on busy days. Leftovers store and reheat well, making it great for planning meals you’ll come back to later. It’s simple, flexible, and reassuring for cooks who save recipes to make when life slows down.
Tips & Tricks
- Keep the rolls intact: Cutting the rolls as a whole slab helps them bake evenly. Separating them too early often leads to dry edges and uneven filling, which can make the sliders harder to serve cleanly.
- Go light on the filling: Adding too much meat or cheese can cause sliding and uneven baking. A moderate layer keeps the texture soft and makes the sliders easier to slice without falling apart.
- Brush, don’t pour: Brushing the butter mixture slowly helps it soak in evenly. Pouring it all at once can create soggy spots and leave other areas dry.
- Let them rest briefly: Giving the sliders a few minutes after baking helps everything set. Cutting too soon can cause layers to slip and lose that neat, cozy look.
Variations
- Meaty version: Add a second type of cooked meat, like chicken or beef, in a thin layer. Keep portions small so the sliders don’t feel heavy. This works well when serving bigger appetites without changing the method.
- Vegetarian option: Swap the meat for sautéed mushrooms, onions, or roasted vegetables. Use a mild, melty cheese to keep the texture comforting while still feeling filling and familiar.
- Ingredient swap: Use dinner rolls or mini buns instead of slider rolls. Watch the baking time closely, as softer breads can brown faster and may need less uncovered time.
- Flavor or herb boost: Add dried herbs like parsley or thyme to the butter mixture. This small addition adds aroma and depth without changing the cozy feel of the dish.
Serving Suggestions
- Simple family meal: Serve with oven fries or roasted potatoes. The soft sliders pair well with something crisp, creating a balanced dinner that feels relaxed and complete.
- Soup night pairing: Pair with tomato or vegetable soup. The sliders are easy to dip, making this a comforting option for cooler evenings.
- Casual gathering tray: Arrange on a platter and slice cleanly for sharing. Add a simple salad on the side to keep the meal light and inviting.
- Next-day lunch: Wrap leftovers individually and serve with fruit or fresh veggies. They reheat easily and still feel homemade the next day.
Storage Instructions
- Fridge storage: Store leftovers in an airtight container in the refrigerator for up to three days. Keeping them tightly covered helps prevent the rolls from drying out.
- Reheating: Reheat in the oven or toaster oven at a low temperature. Cover loosely so the bread stays soft. Microwaving works but may soften the rolls more.
- Freezing: Cool completely, then wrap sliders individually. Freeze for up to one month. Thaw overnight in the fridge before reheating for best texture.
- Make-ahead tips: Assemble the sliders and refrigerate unbaked for up to 24 hours. Add the butter mixture just before baking to keep the bread from soaking too much.
Recipe Timing
Prep Time: 10 minutes
Cook Time: 20 minutes
Rest Time: 5 minutes
Total Time: 35 minutes
Nutrition Information (Approximate)
Each serving contains about 280–340 calories, depending on bread and filling choices. Protein ranges from 14–18 grams per serving. These sliders also provide calcium from cheese and small amounts of iron from the filling. Values are estimates and may vary by ingredients and portion sizes.
FAQs
Can I make these ahead of time?
Yes, assemble and bake later the same day.
What’s a common mistake to avoid?
Overfilling the sliders.
Can I change the cheese?
Yes, any melty cheese works.
Why do my sliders feel soggy?
Too much sauce or under-baking.
How long do leftovers last?
Up to three days refrigerated.
How can I adjust the flavor?
Add more mustard or herbs.
Conclusion
This recipe is meant to feel easy and comforting, not complicated. You can adjust the fillings, change the flavors, and reuse the method whenever you need something warm and familiar. It’s the kind of meal that fits busy days and quiet evenings alike. Saving this sliders recipe means having a reliable option ready when you want something homemade without extra work. Make it once, make it again, and let it become part of your regular rotation.
Sliders Recipe
Course: Ham Sliders6
servings10
minutes20
minutes300
kcalSoft baked sliders filled with savory layers and brushed with a buttery topping. Simple to prepare and comforting, they’re perfect for family dinners or relaxed gatherings.
Ingredients
12 slider rolls
12 slices cooked meat
6 slices cheese
4 tablespoons melted butter
1 tablespoon mustard
1 tablespoon honey
½ teaspoon garlic powder
½ teaspoon onion powder
¼ teaspoon black pepper
Directions
- Preheat oven and grease a baking dish.
- Slice rolls in half and place bottoms in dish.
- Layer meat evenly, then add cheese.
- Place roll tops back on.
- Mix butter, mustard, honey, and seasonings.
- Brush mixture over rolls.
- Cover and bake until warm and melted.
- Uncover briefly to brown tops.
- Rest, slice, and serve.